
💬 How to Create Your First Conversation AI Agent
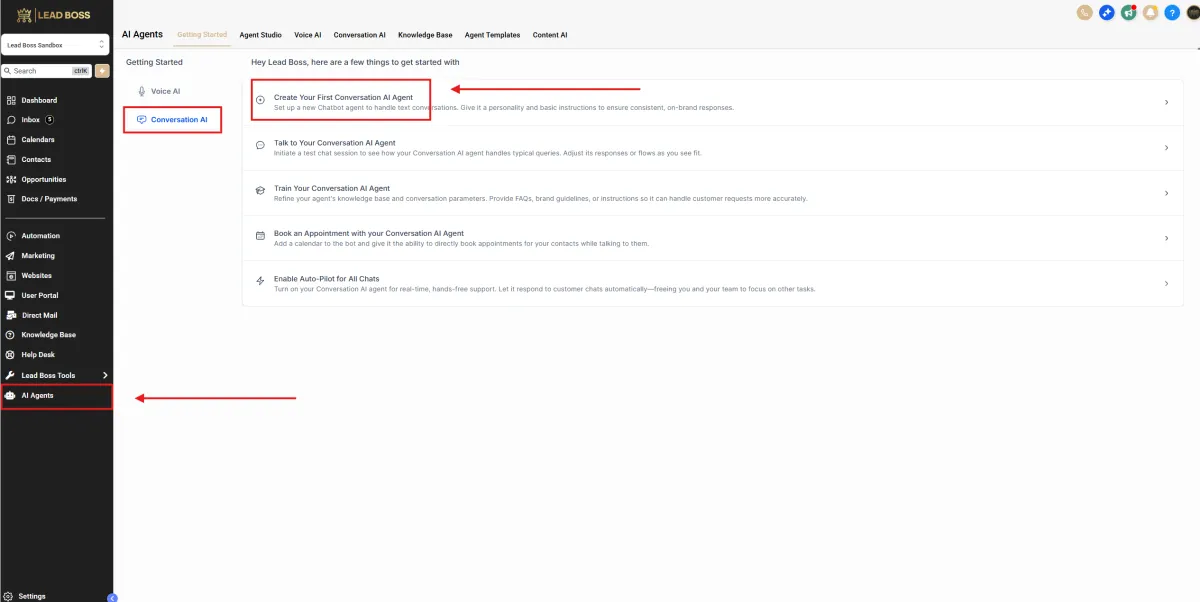
1️⃣ Navigate to Conversation AI
📍 Left Sidebar → AI Agents
Click → Conversation AI
You will see the “Getting Started” screen.
2️⃣ Click “Create Your First Conversation AI Agent”
This is the first option on the page.
This will launch the setup wizard for your SMS & Webchat AI agent.
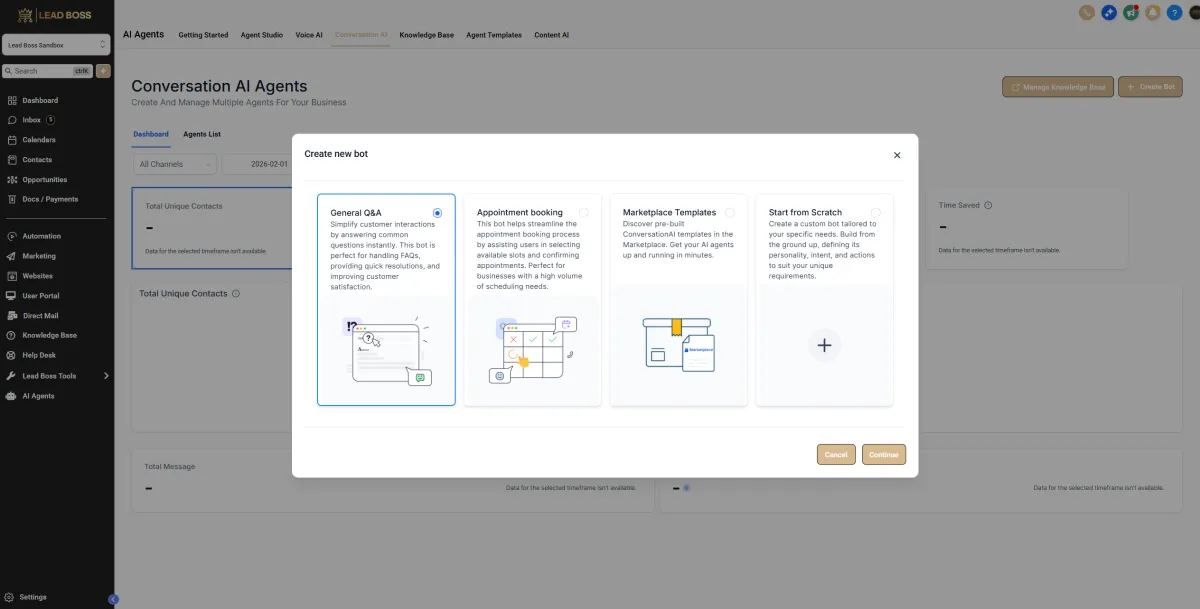
Bot Type Selection
1️⃣ General Q&A
Used for:
Answering common questions
Handling SMS conversations
Managing Webchat
Providing information from your Knowledge Base
Collecting contact details
Select this option if the bot will respond to general inquiries and FAQs.
2️⃣ Appointment Booking
Used for:
Scheduling appointments
Showing calendar availability
Confirming bookings inside chat
Select this option if the primary function is booking appointments.
3️⃣ Marketplace Templates
Used for:
Pre-built industry templates
Faster deployment
Structured predefined conversation flows
Select this option if using an available template.
4️⃣ Start From Scratch
Used for:
Fully custom configuration
Custom personality and instructions
Advanced intent and routing setup
Select this option if building a bot from the ground up.
After selecting the appropriate option:
Click Continue to proceed to the configuration screen.
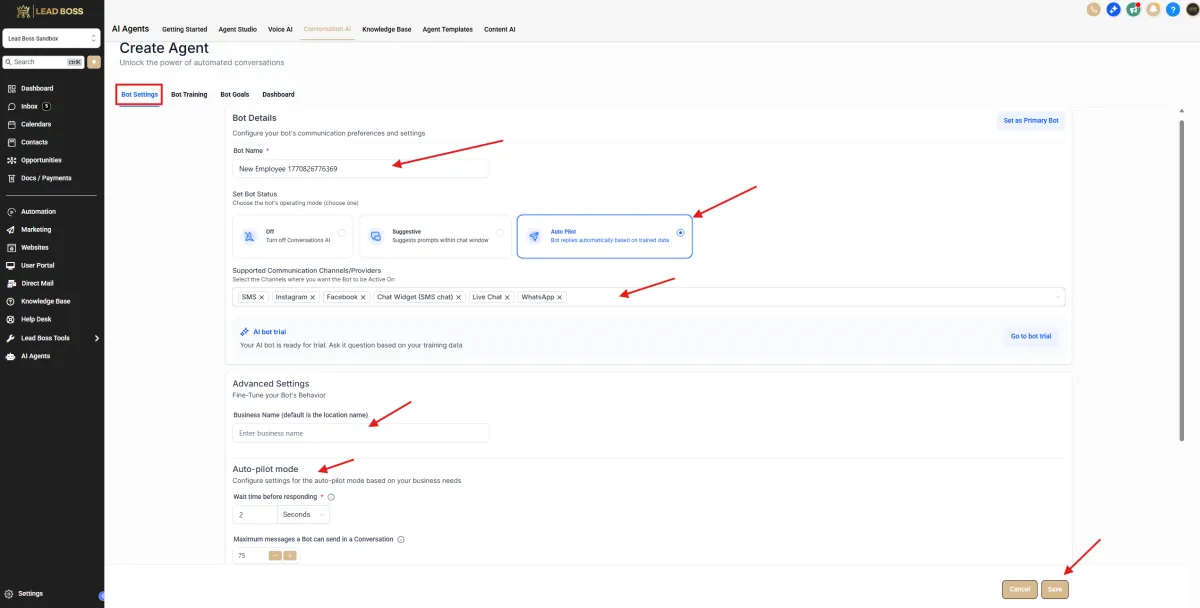
Bot Settings
1️⃣ Bot Name
Enter the internal name for the bot.
Example format:
Lead Boss CRM – Conversation AI
This is for internal identification only.
2️⃣ Set Bot Status
Choose the operating mode:
Off → Bot is disabled
Suggestive → Bot suggests replies (manual approval required)
Auto Pilot → Bot replies automatically
Select the mode based on how you want conversations handled.
3️⃣ Supported Communication Channels
Select where the bot will operate:
SMS
Chat Widget (SMS chat)
Live Chat
Enable only the channels you want the bot active on.
4️⃣ Advanced Settings
Business Name
Enter the display business name:
Lead Boss CRM
This may be referenced in conversations.
5️⃣ Auto-Pilot Mode Settings
If Auto-Pilot is enabled:
Wait time before responding → Set response delay (e.g., 2 seconds)
Maximum messages per conversation → Define conversation limit
Adjust based on your communication preferences.
6️⃣ Final Step
Click Save
The bot settings will now be applied.
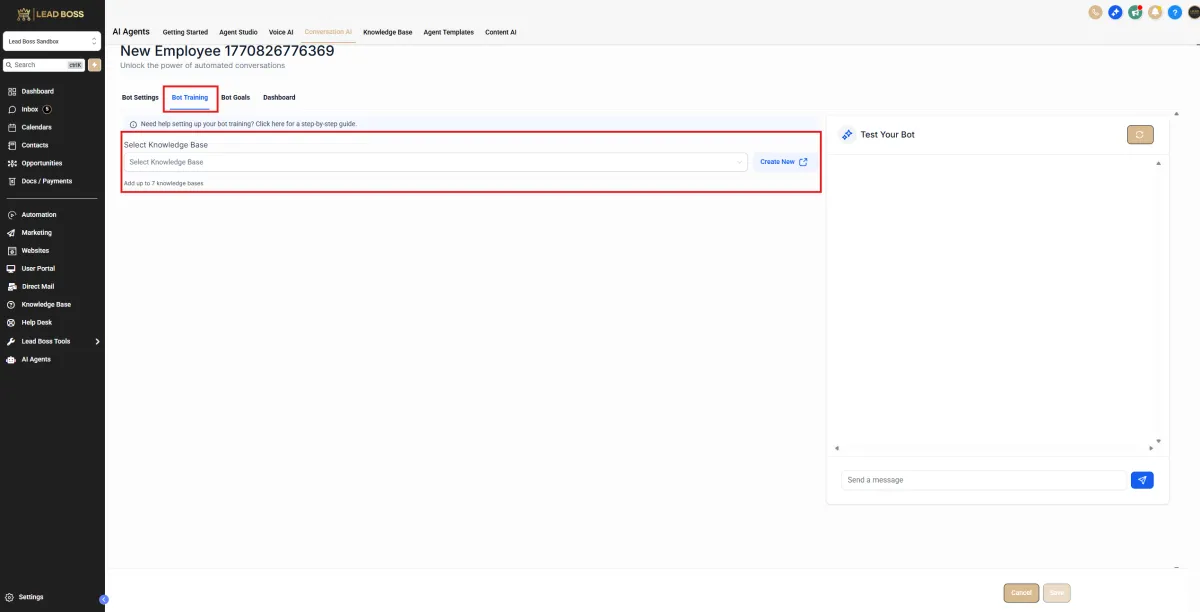
Bot Training
1️⃣ Select Knowledge Base
Under Select Knowledge Base:
Click the dropdown
Choose an existing Knowledge Base
OR
Click Create New to build one
You can attach up to 7 Knowledge Bases to one bot.
2️⃣ What the Knowledge Base Does
The Knowledge Base trains the bot on:
Business information
Services
FAQs
Policies
Responses
Brand tone
The bot uses this data to generate replies in SMS and Webchat.
3️⃣ Test Your Bot
On the right side:
Use the Test Your Bot panel to:
Send sample messages
Check response accuracy
Verify tone
Confirm it pulls correct information
4️⃣ After Selecting Knowledge Base
Click Save to apply training.
Then move to:
Bot Goals tab.
Bot Goals
1️⃣ Prompt Section (Personality & Goal)
This controls how the bot speaks and behaves.
Personality
Define:
Who the bot is
Tone
Limitations
Example structure:
Identify the business name
State the bot’s role
Define what it can and cannot do
Goal
Define the bot’s primary objective.
Examples:
Assist customers with inquiries
Collect lead information
Route conversations
Provide FAQ support
Keep this clear and specific.
Additional Information
Use this area for:
Conversation guidelines
Tone instructions
Response length limits
Escalation rules
Example settings:
Keep responses concise
Ask one question at a time
Escalate when unsure
2️⃣ Setup Your Actions
Enable the actions the bot is allowed to perform:
Appointment Booking
Trigger a Workflow
Contact Info (collect/update fields)
Stop Bot
Human Handover
Transfer Bot
Auto Followup
Only enable actions required for your automation flow.
3️⃣ Test Your Bot
Use the panel on the right to:
Send sample messages
Verify tone
Confirm workflow triggers
Check data capture
4️⃣ Save Changes
Click Save after configuring goals and actions.
