How to Add Signature Fields to Documents
📌 Step 1: Open the Document Editor
1️⃣ Navigate to Docs / Payments from the left sidebar.
2️⃣ Click Documents & Contracts.
3️⃣ Open an existing document template or create a new one.
4️⃣ The document editor will open.
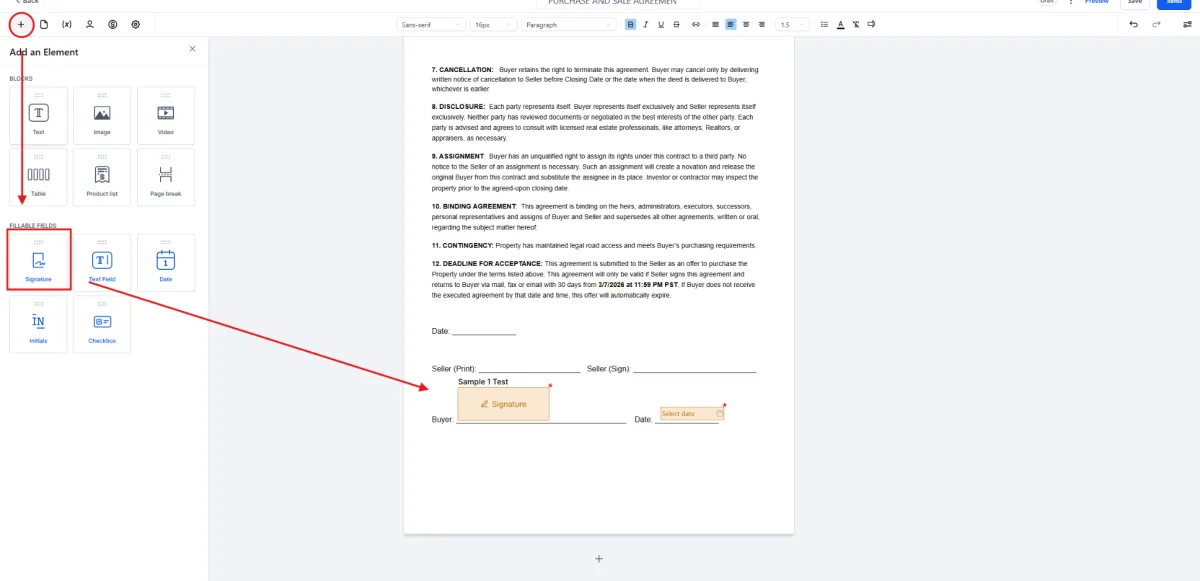
➕ Step 2: Open the Elements Panel
1️⃣ In the document editor, click the ➕ (Add Element) icon on the left side.
2️⃣ The Add an Element panel will appear.
3️⃣ Scroll to the Fillable Fields section.
✍️ Step 3: Add a Signature Field
1️⃣ Click or drag the Signature field into the document.
2️⃣ Place the signature field in the location where the recipient should sign.
Example:
Under Buyer Signature or Seller Signature in a contract.
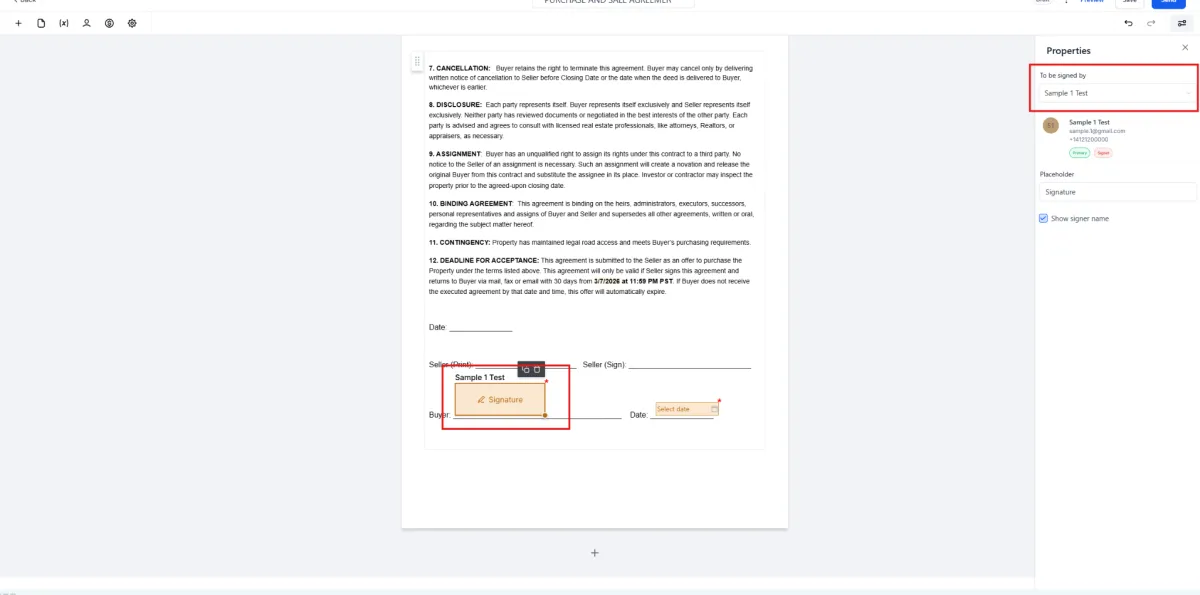
⚙️ Step 4: Assign the Signer
1️⃣ Click on the Signature field inside the document.
2️⃣ On the right side, the Properties panel will appear.
3️⃣ Under To be signed by, select the recipient who will sign the document.
Example:
Primary Client
Additional Recipient
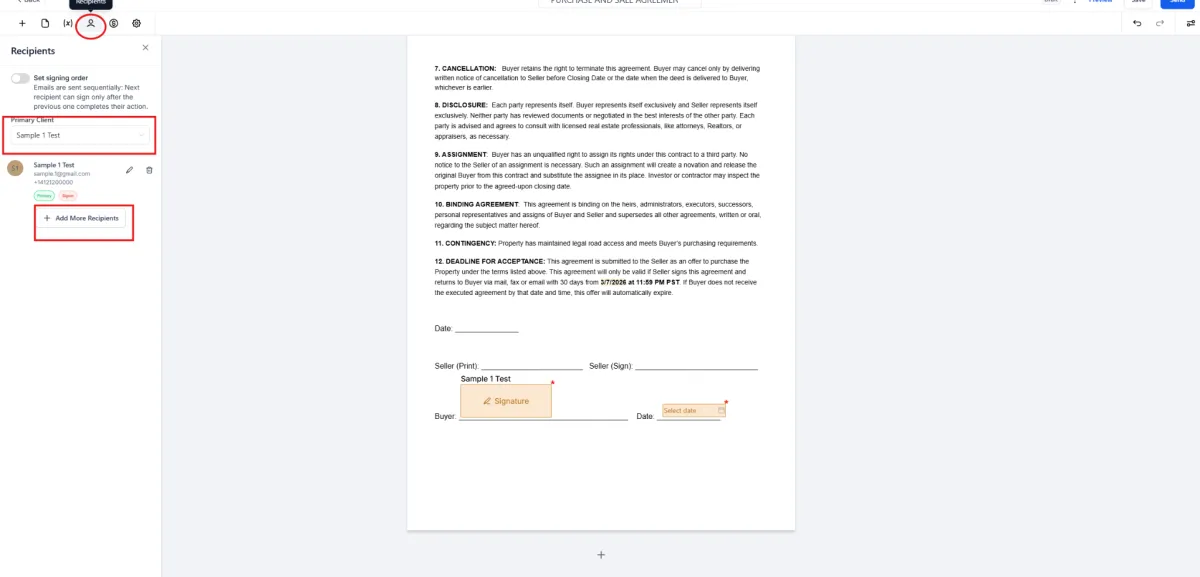
👤 Step 5: Confirm the Document Recipient
1️⃣ At the top of the editor, click the Recipients icon.
2️⃣ Confirm the Primary Client who will receive the document.
3️⃣ If needed, click Add More Recipients to include additional signers.
💾 Step 6: Save the Document
1️⃣ After placing the signature fields, click Save.
2️⃣ Your document is now ready to be sent for electronic signature.
📊 Expected Result
When the document is sent, the recipient will be able to sign the document electronically in the designated signature field. Once completed, the signed document will be saved inside the CRM.