How to Configure Site Settings
⚙️ Site Settings
📌 Step 1: Access Site Settings
1️⃣ Navigate to your Site Settings from the dashboard.
2️⃣ This section allows you to manage your website’s core configuration.
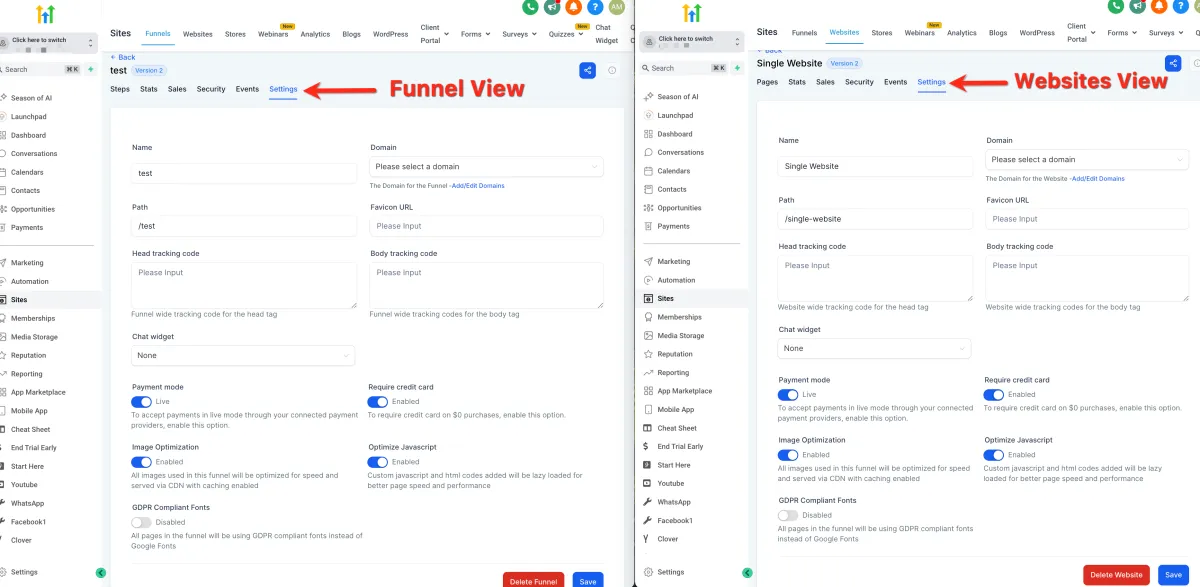
🏷️ Step 2: Set Basic Information
Name
The internal name of your site
Not visible to visitors
🌐 Domain
The main URL of your website (e.g., yourdomain.com)
Required for your site to be accessible online
⚠️ Without a domain, users can only access your site via preview links (not recommended).
🔗 Path
The URL extension for each page
Example: yourdomain.com/about → /about is the path
⚠️ Each page must have a unique path.
🖼️ Step 3: Add Branding عناصر
Favicon
The small icon shown in browser tabs
1️⃣ Upload your image to the media library
2️⃣ Copy the shareable image URL
3️⃣ Paste it into the favicon field
💡 Applies to all pages on your site.
📊 Step 4: Add Tracking Codes
Head Tracking Code
Loads scripts in the header of your site
Body Tracking Code
Loads scripts inside the body
💡 Used for tools like:
Analytics
Pixels
Third-party integrations
💳 Step 5: Configure Payment Mode
Test Mode → Use Stripe test cards for testing
Live Mode → Accept real payments
💡 Recommended to test first, then switch to live before launch.
⚡ Step 6: Optimize Performance
Image Optimization
Automatically compresses images for faster loading
Enabled by default (recommended to keep ON)
Optimize JavaScript
Improves loading performance of custom scripts
Uses lazy loading for better speed
⚖️ Step 7: GDPR Font Settings
GDPR Compliant Fonts
Removes non-compliant fonts
Helps meet legal/privacy requirements
⚠️ Always consult a legal professional for compliance.
💬 Step 8: Configure Chat Widget
1️⃣ Set up your chat widget under:
Sites → Chat Widget
2️⃣ Enable to:
Display on all pages
3️⃣ Or disable and:
Add manually to specific pages using code