
How to Create a Workflow/Automation
1️⃣ Go to Workflows
From the left sidebar:
Click Automation → Select Workflows
You will land on the Workflow List page.
2️⃣ Create a New Workflow
In the top right corner, click:
+ Create Workflow
You have two options:
Start from Scratch
Build Using AI
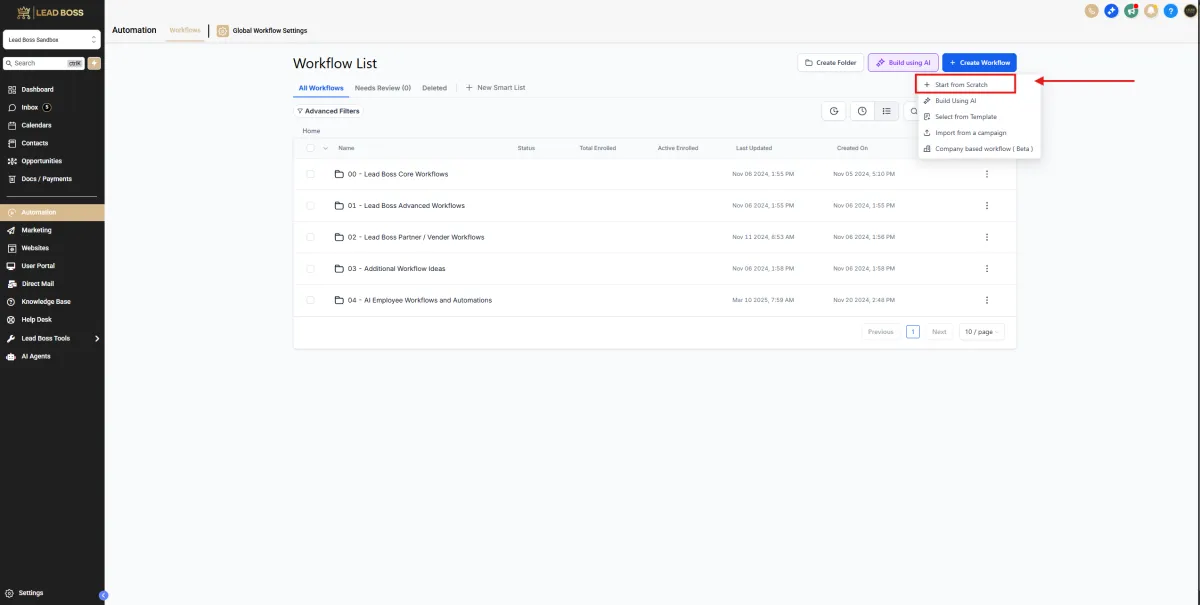
Option 1: Start from Scratch
Click Start from Scratch.
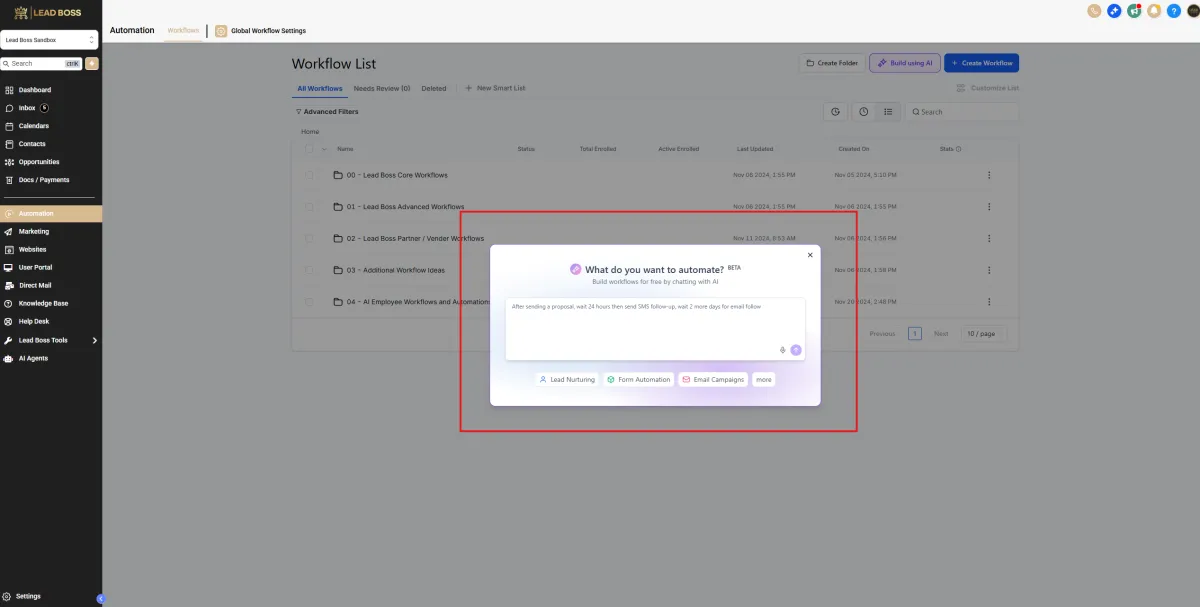
Option 2: Use Workflow AI (Recommended for Speed) 🤖
Instead of building manually, click:
Build Using AI
A popup will appear that says:
“What do you want to automate?”
Simply type your instructions in plain English.
Example:
“When form is submitted, add a tag, send SMS immediately, wait 10 minutes, then send email.”
“When opportunity moves to Hot Lead, notify sales rep and create a task.”
“After proposal is sent, wait 2 days and send follow-up email.”
The AI will:
Create the trigger
Add all actions
Build the workflow structure automatically
Then you can:
Review the steps
Edit anything if needed
Click Save
Toggle to Publish
Building From Scratch
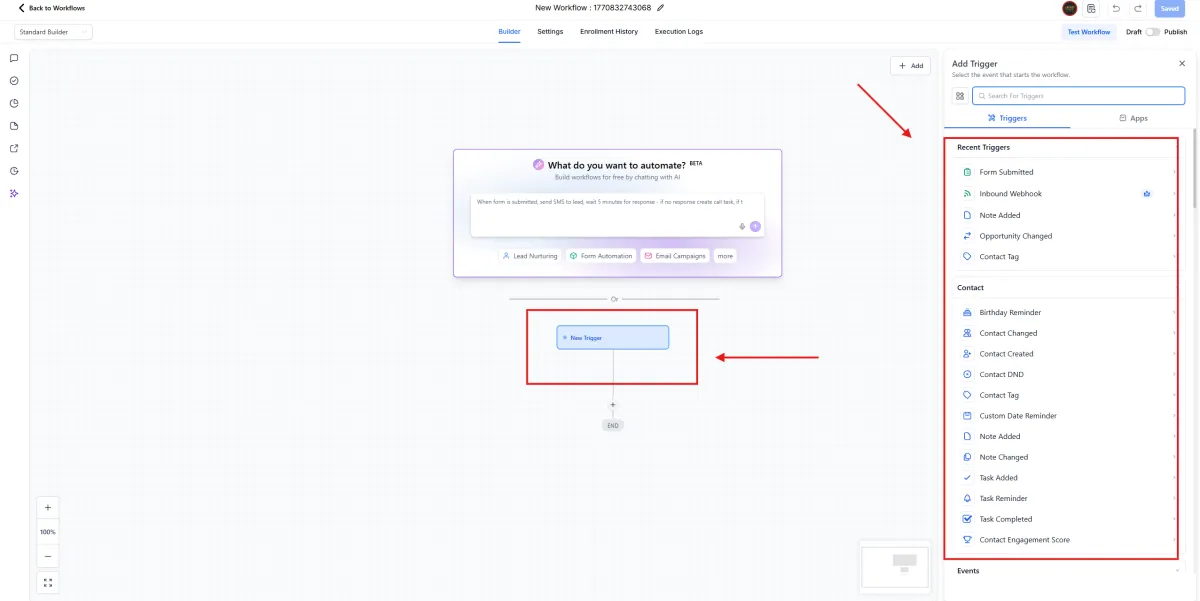
3️⃣ Add a Trigger
Once inside the workflow builder:
Click + Add Trigger
OR click the New Trigger box.
On the right panel, select a trigger such as:
Form Submitted
Contact Created
Contact Tag
Opportunity Changed
Inbound Webhook
Task Completed
Contact Changed
And more
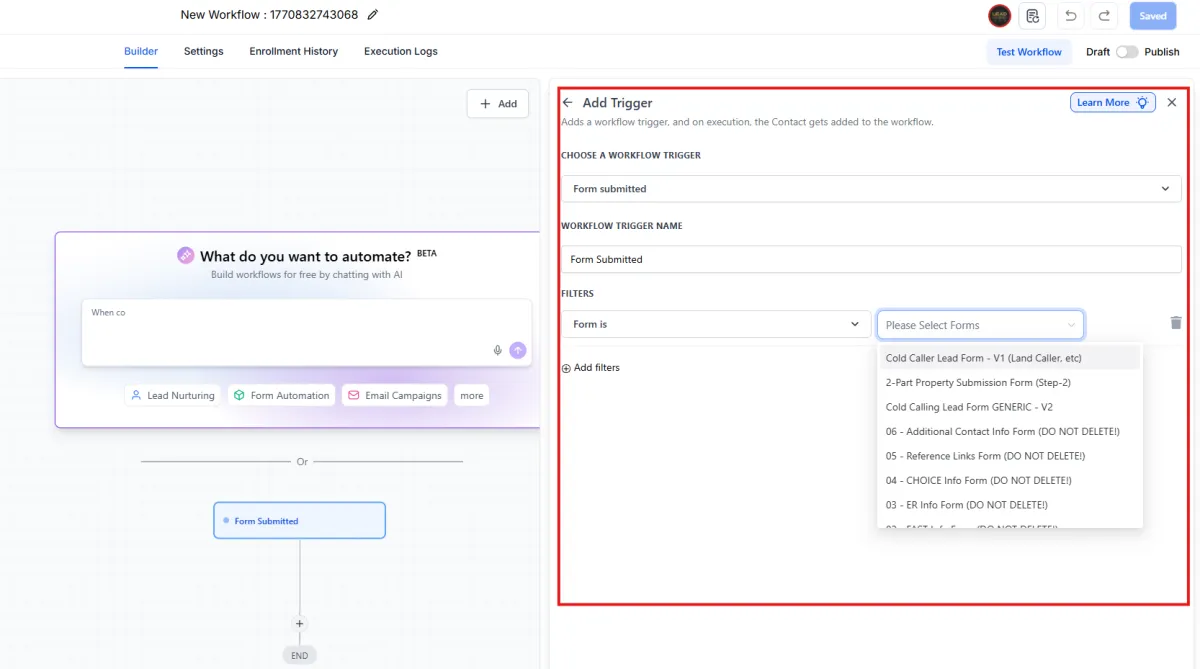
4️⃣ Configure the Trigger
If selecting Form Submitted:
Choose the specific form from the dropdown
Add filters if needed
Name your trigger
Click Save
Your trigger will now appear in the workflow.
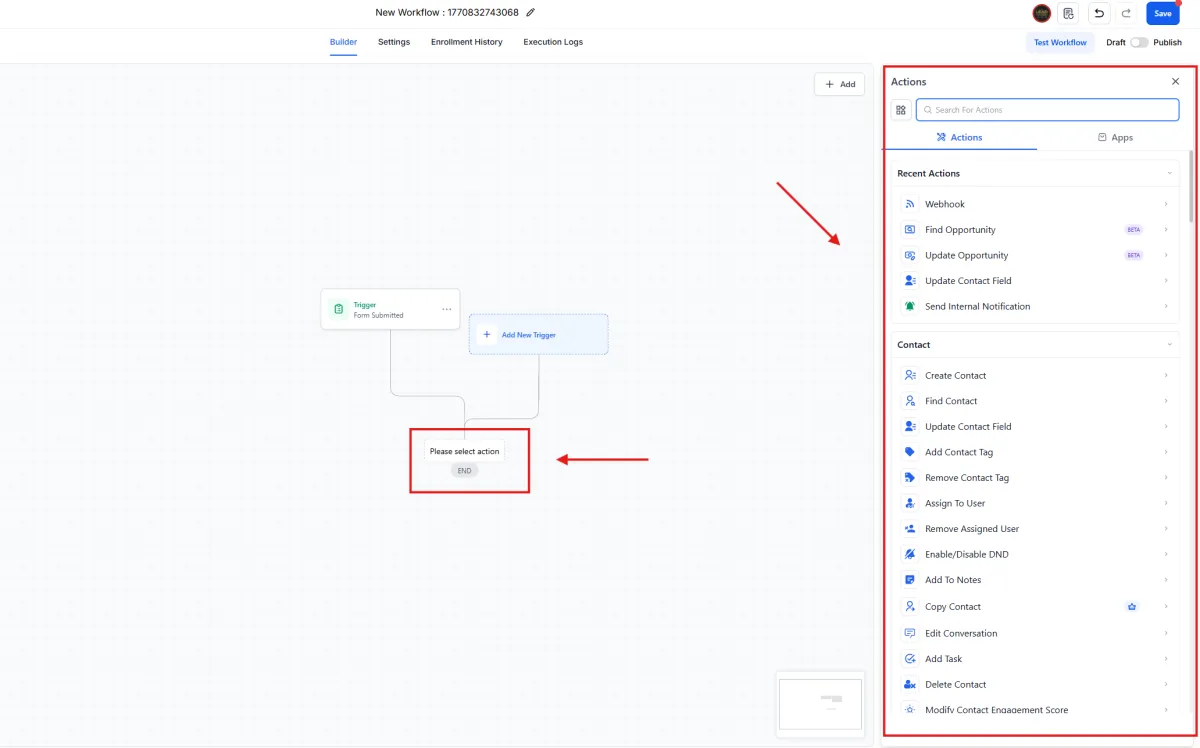
5️⃣ Add an Action
Click the + icon under the trigger.
On the right-side Actions panel, choose what happens next.
Common actions include:
Send Email
Send SMS
Add Contact Tag
Remove Contact Tag
Assign To User
Update Contact Field
Create Task
Add to Notes
Update Opportunity
Send Internal Notification
Enable/Disable DND
Click the action to configure it.
6️⃣ Build the Automation Flow
Continue clicking the + icon to stack additional actions.
Example workflow:
Trigger → Form Submitted
⬇
Add Tag
⬇
Send Email
⬇
Send SMS
⬇
End
You can build as many steps as needed.
7️⃣ Save the Workflow
Click Save in the top right corner.
You can click Test Workflow to test it before going live.
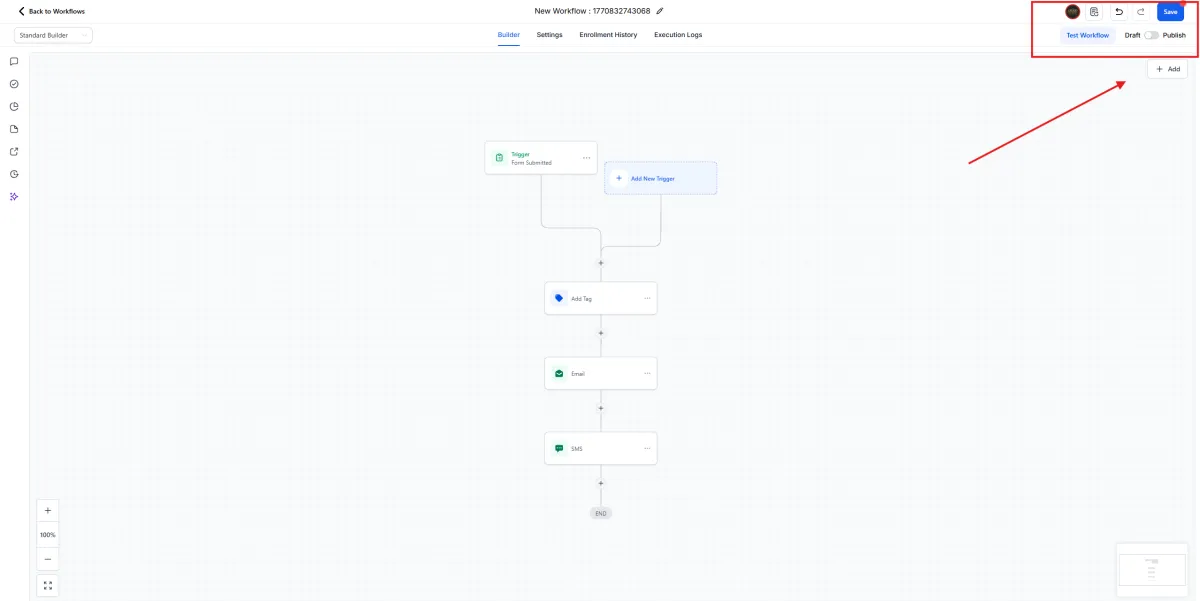
8️⃣ Publish the Workflow
Toggle from Draft to Publish in the top right.
Once published, the workflow becomes active.