How to Import Your Contacts
📌 Step 1: Navigate to the Contacts Section
1️⃣ Login to LeadBossCRM.
2️⃣ Navigate to the Contacts section.
3️⃣ Click Import Contacts (or Import) in the top-right menu.

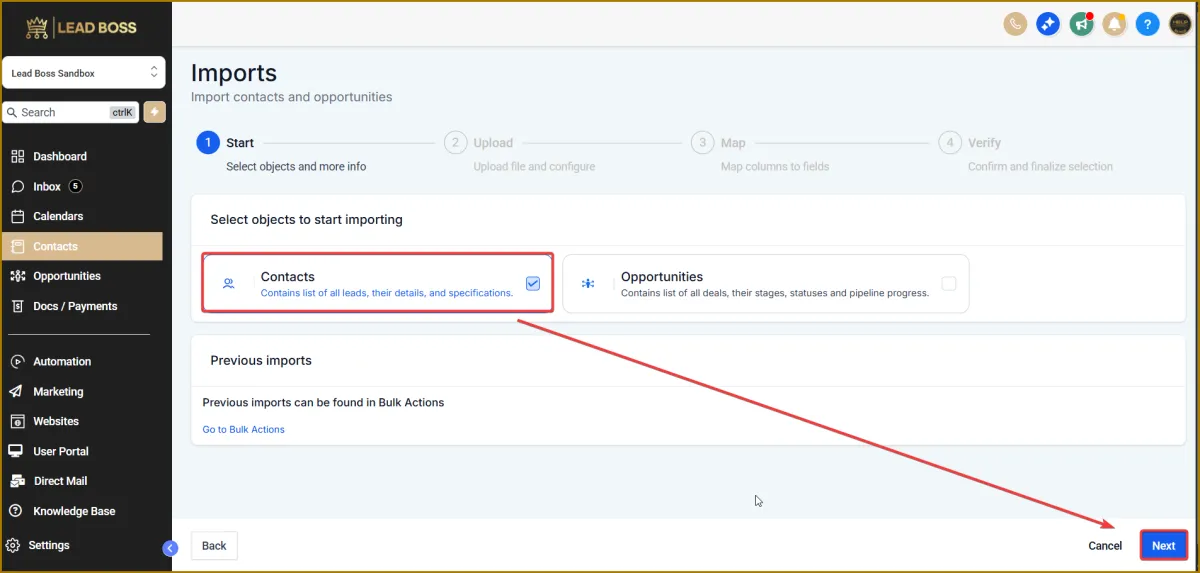
By default, the checkbox for Contacts is already selected.
Simply confirm the selection and click Next to continue.
📂 Step 2: Prepare Your CSV File
🔹 Ensure your file is in CSV format.
🔹 Each column should represent a field
(e.g., First Name, Last Name, Email, Phone, APN).
🔹 Make sure your data is clean and properly formatted to avoid import errors.
⚠️ Important Note:
Contacts that do not include a name, email address, or phone number will not be imported.
Each contact must have at least one of these three fields to be successfully imported.
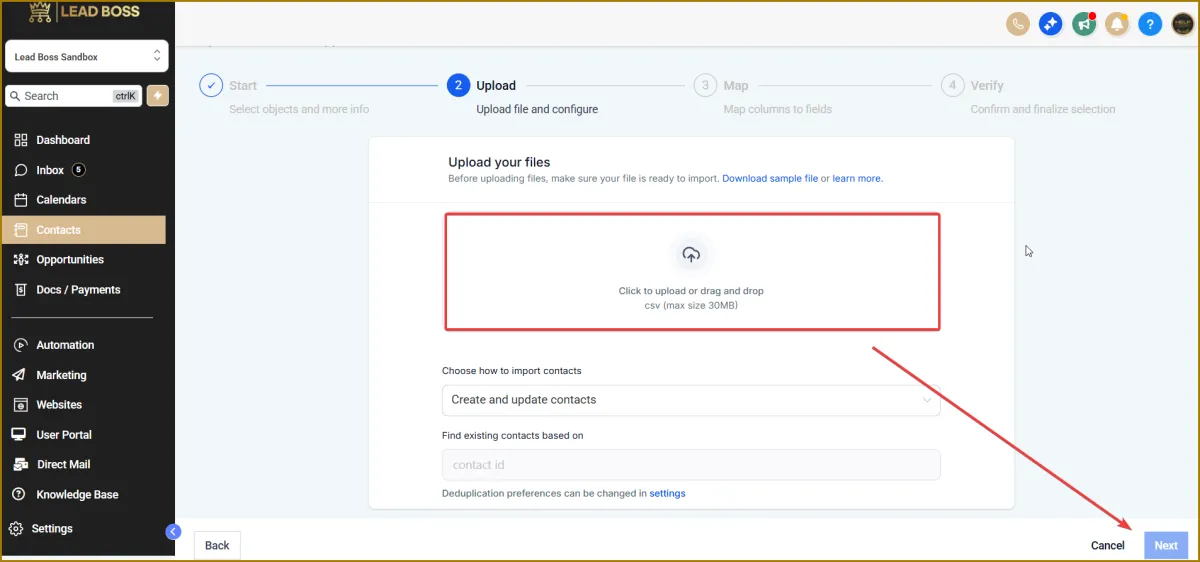
⬆️ Step 3: Upload the File
1️⃣ Click Upload File and select your CSV file.
2️⃣ Once uploaded, click Next to proceed to the field-mapping step.
⚠️ Note: Maximum file size is 30MB per upload.
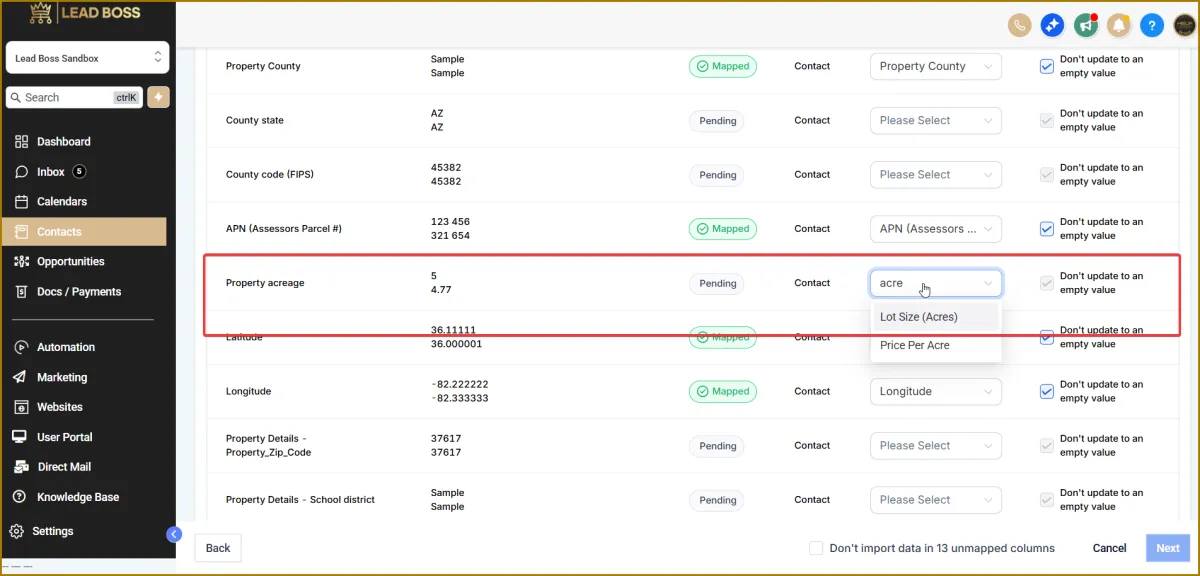
🧩 Step 4: Map Your Fields
🔹 Match each column in your CSV file to the corresponding field in Lead Boss CRM.
🔹 In most cases, mapping is done automatically, so manual mapping is not required.
🔹 Example:
If your CSV column header is labeled “Property County” and a field with the same name exists in Lead Boss CRM, the system will automatically recognize and map it.
🔹 You only need to manually map fields if the column names in your CSV do not match the field names in Lead Boss CRM.
🔹 For manual mapping:
Select the appropriate field from the dropdown menu that corresponds to your CSV column.
🔹 Unmapped fields can be skipped.
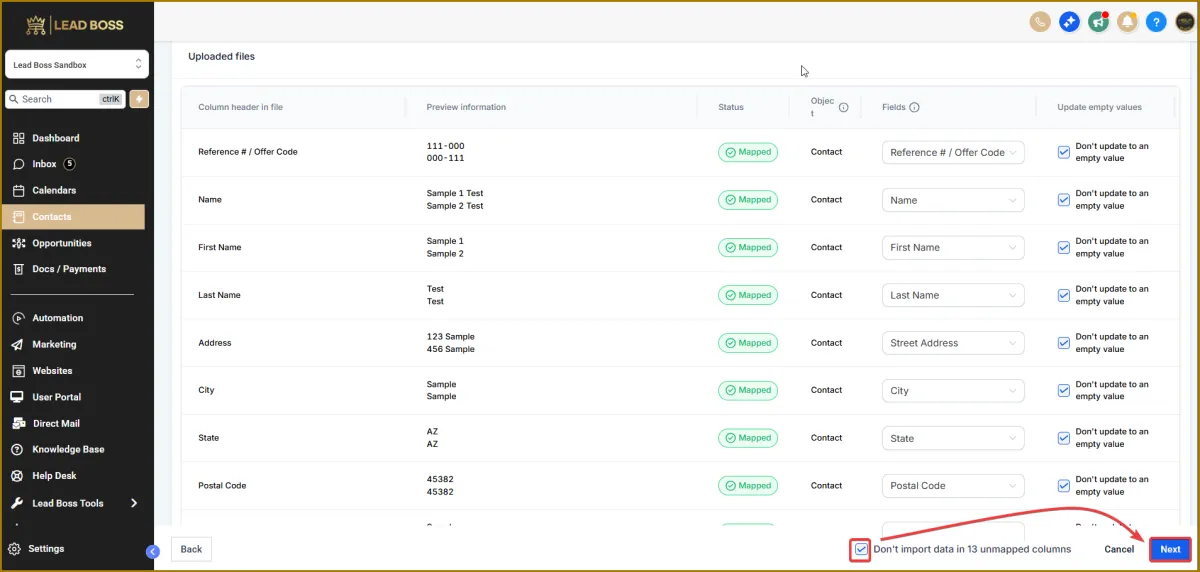
✅ Step 5: Review and Import
1️⃣ Review the import summary to ensure everything looks correct.
2️⃣ Check the box “Don’t import selected unmapped columns”.
3️⃣ Click Next to continue.
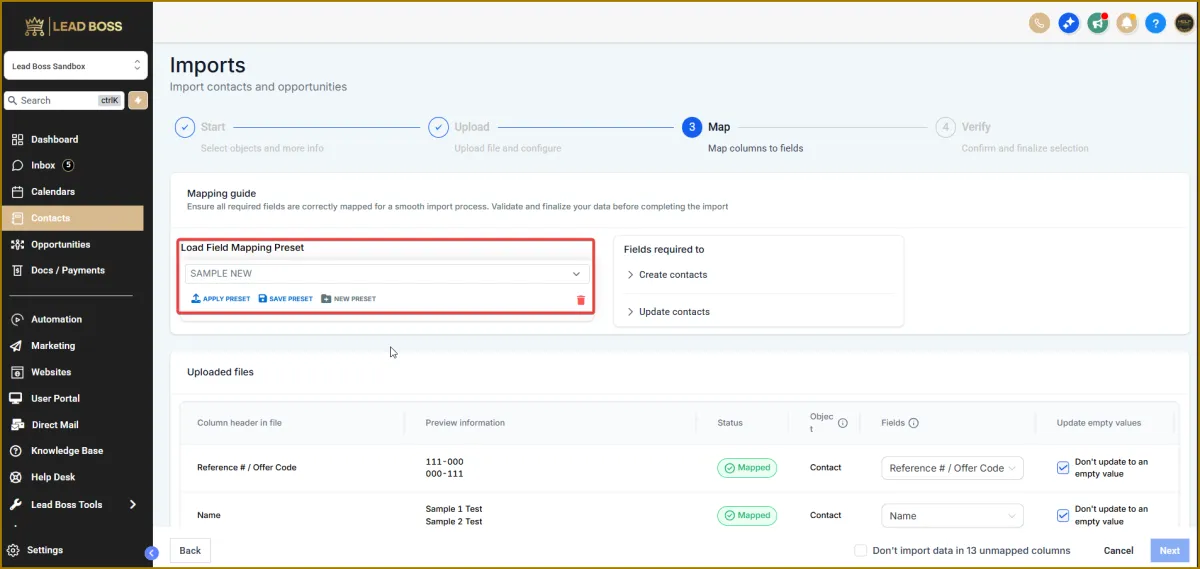
🧠 Using Presets During Contact Import
🔹 After mapping your fields, you’ll see a Preset option.
🔹 Presets allow the system to remember how your fields are mapped so you can reuse the same configuration for future imports.
Preset Options
🔸 Save Preset
Use this after finishing field mapping to save the configuration for future imports.
🔸 Apply Preset
Reuse a previously saved preset to automatically apply the same field mappings.
🔸 New Preset
Create a new preset when importing a CSV file with a different format.
🔹 You can create unlimited presets and name or organize them based on your CSV files or import needs, making future imports faster and easier.
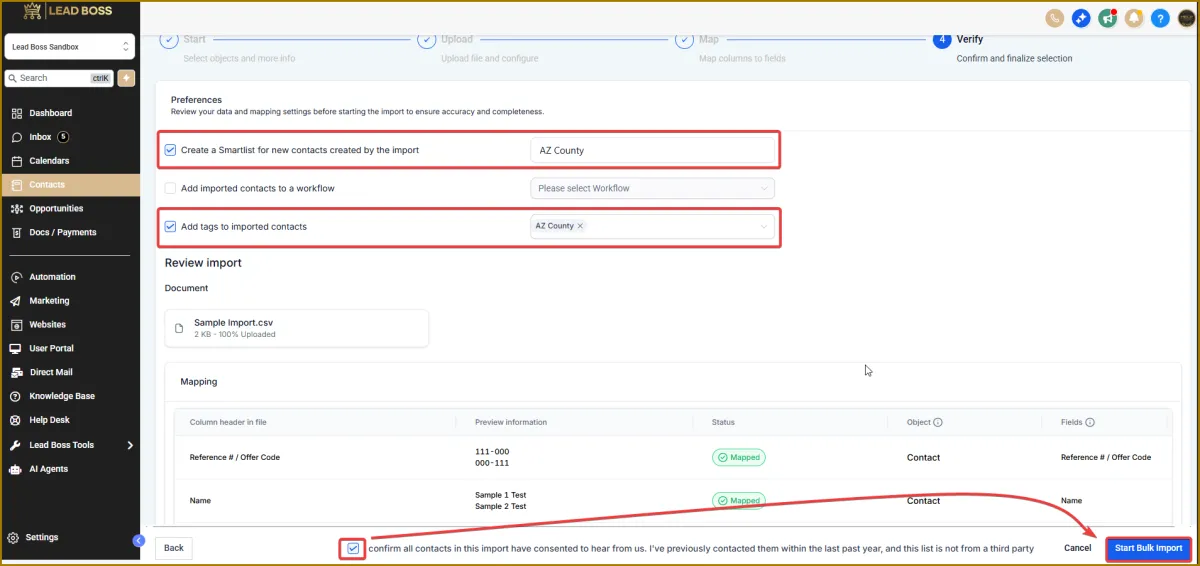
⚙️ Before Finalizing the Import
Before completing the import, you may apply the following optional actions to the imported contacts:
🔹 Create a Smart List
Automatically create a smart list for newly imported contacts to help with organization or campaigns.
🔹 Add to a Workflow
Assign imported contacts to a workflow to trigger automations or follow-up sequences.
🔹 Add Tags
Apply existing tags or create new tags for better contact segmentation.
🚀 Step 6: Complete the Import
1️⃣ Confirm that all contacts in this import have given consent to be contacted by checking the confirmation box.
2️⃣ Click Start Bulk Import to complete the process.
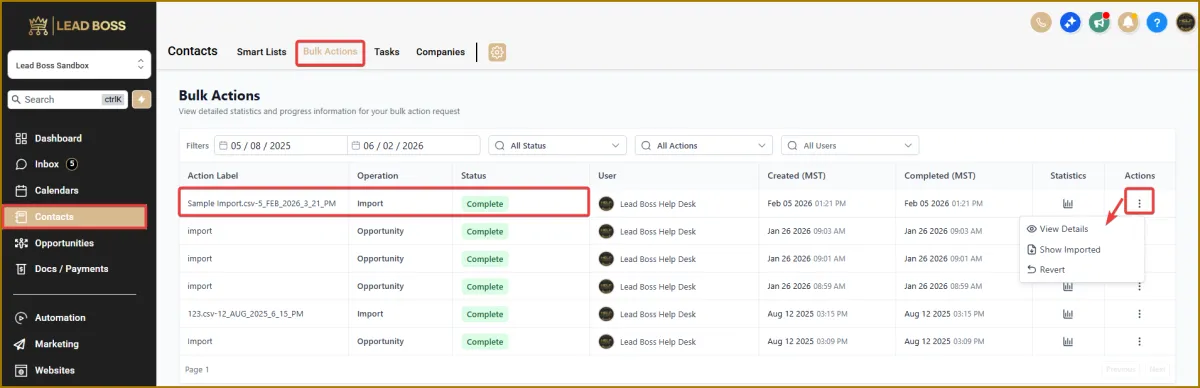
📊 Checking the Status of Your Import
1️⃣ Navigate to Contacts.
2️⃣ Click the Bulk Actions tab at the top.
3️⃣ On the Bulk Actions dashboard, view the status of your import
(e.g., In Progress or Complete).
4️⃣ To view contacts from a specific import, click the three-dot menu next to that import and select Show Imported.