How to Understand Element Nesting in the Page Builder
📌 Step 1: Understand the Basic Structure
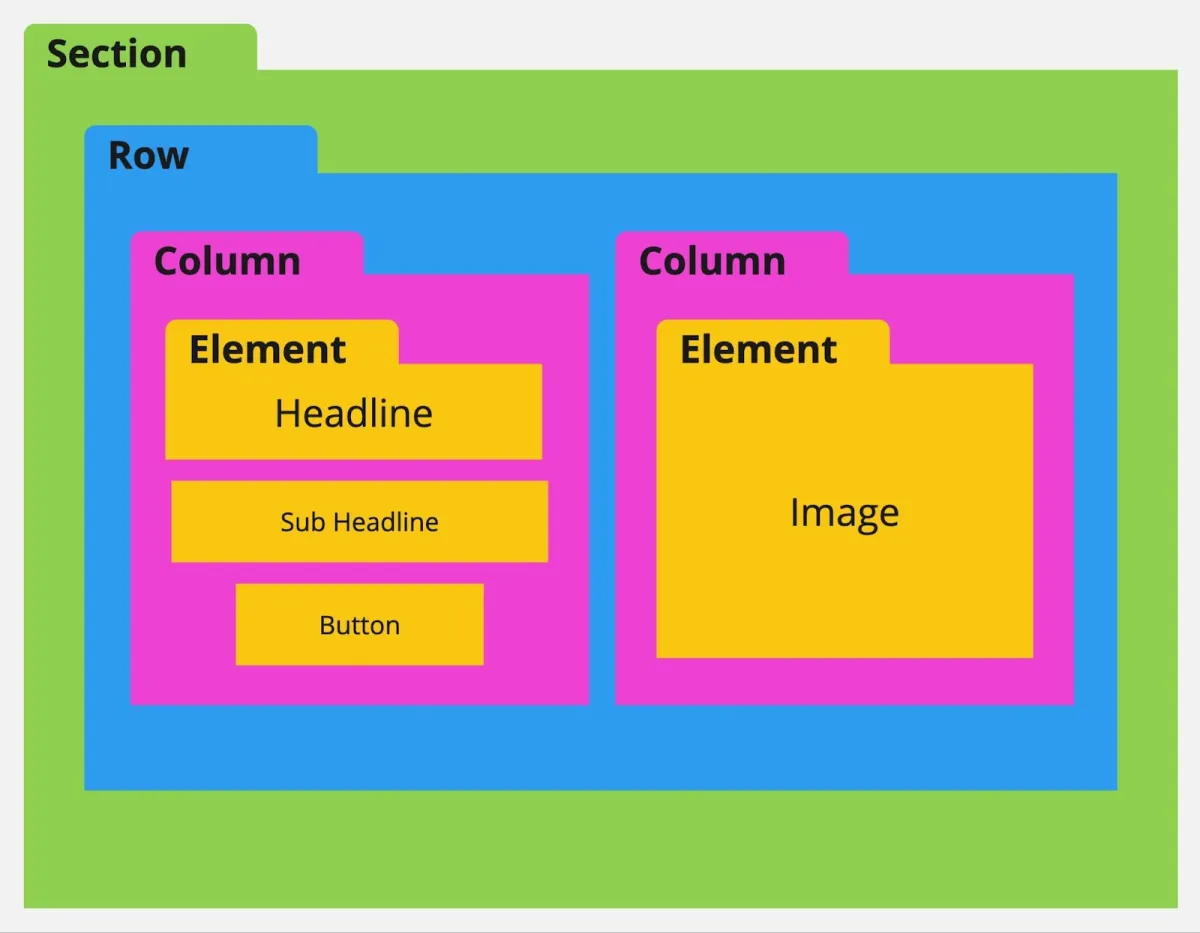
Every page in the builder follows a required structure before adding elements:
1️⃣ You must have a Section
2️⃣ Inside the section, add a Row
3️⃣ Inside the row, add at least one Column
4️⃣ Elements can only be added inside columns
🧱 Step 2: Learn the Element Hierarchy
From largest to smallest, the structure is:
🟢 Sections (Green)
🔵 Rows (Blue)
🌸 Columns (Pink)
🟠 Elements (Orange)
📌 This hierarchy ensures your page layout is organized and functional.
⚡ Step 3: Use Enhanced Drag & Drop (Auto Structure)
1️⃣ With Enhanced Drag & Drop, you don’t always need to manually create sections, rows, and columns.
2️⃣ When you drag an element onto the canvas:
The builder can automatically create the required structure
3️⃣ This makes page building faster and more beginner-friendly.
🚫 Step 4: Understand Nesting Limitations
There are important rules when building your layout:
❌ You cannot add:
A section inside another section
A row inside another row
A column inside another column
An element inside another element
➕ Step 5: Understand What You Can Add
✅ You can:
Add multiple rows inside a section
Add multiple columns inside a row
Add multiple elements inside a column